
I’m always getting this question from you guys.
“Pedro, you frequently use the 2-minute time frame to trade and I don’t have it on my MT4 platform.
Any tip to help me?”
Yes, I finally have a solution for all the MT4 users that need custom time frames!
M2, M3, M4, M10, H2, H3, H8, and so on…
Today we’re going to learn how to add custom time frames to your MT4 platform.
If you want to see a video version of this post just click play, otherwise, keep reading.
Step #1 – Download the FX Blue Tick Charts for MT4
Go to the FX Blue website and download the FX Blue Tick Charts for MT4.
Warning: Don’t rush to install and configure it by yourself before reading this article because there are a few things that you need to know first or you may struggle a bit before putting it to work properly.
After downloading just install the software.
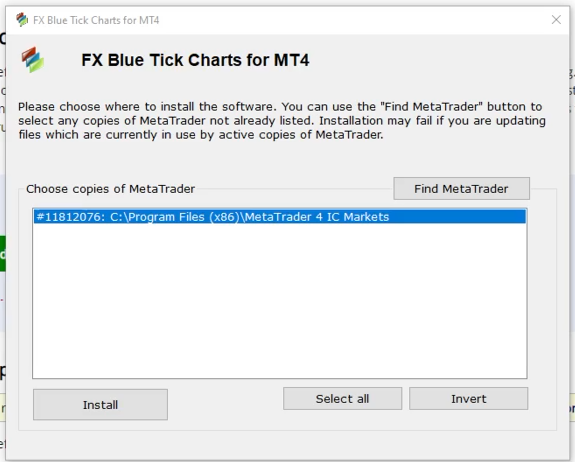
It’s an executable file, it will just ask you for the MT4 platform where you want to install the software, select it and it’s done.
Step #2 – Open the MT4 Navigator and locate the time frame generator
On your MT4 platform open your navigator window from the “View” menu, or simply hit CTRL+N.
On your navigator window, scroll down to the “Expert Advisors” menu and expand it.
You should see the “FX Blue Custom Timeframe Generator” there.
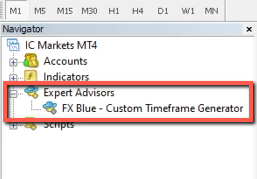
If you don’t see it, right-click somewhere inside the “Expert Advisors” menu and hit refresh.
You should be good to go now.
Step #3 – Open a chart with the symbol where you want to add the custom time frame.
Open a chart with the symbol where you want to create the custom time frame.
In this example, I’m using US30.
Then, switch to the M1 time frame.

This is important because the custom time frames will be built based on your MT4 platform M1 history.
Step #4 – Add the time frame generator to the chart
Drag the “FX Blue Custom Timeframe Generator” from the Navigator to the chart.
A pop-up menu should appear.
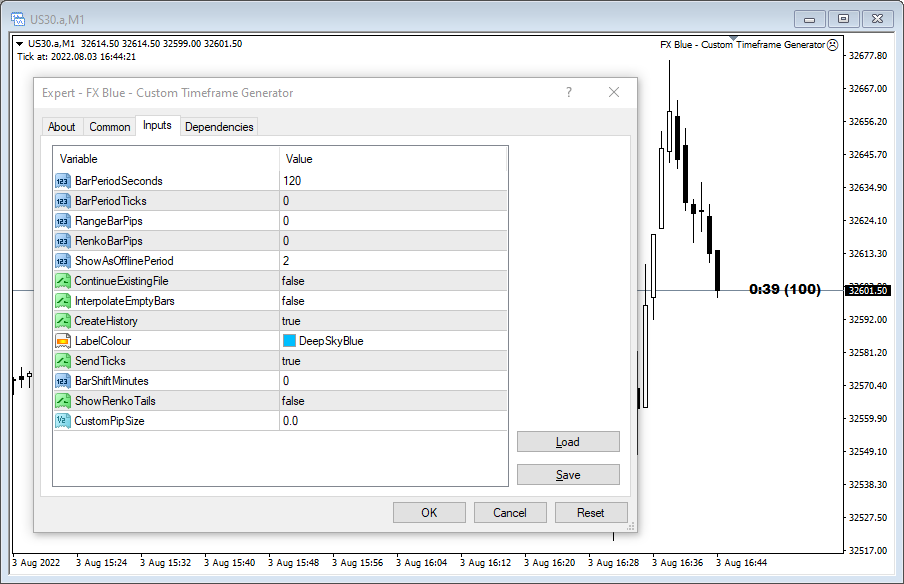
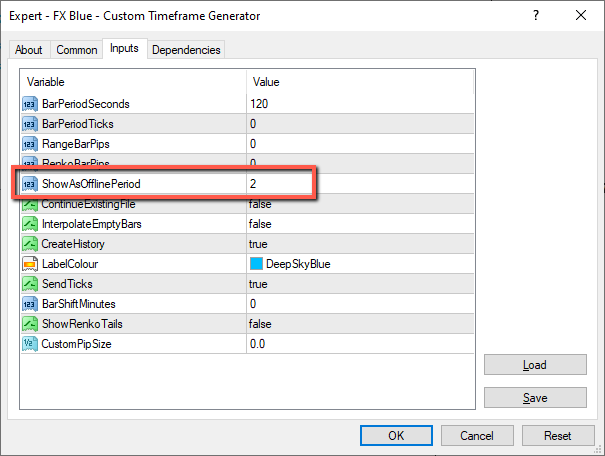
Step #5 – Configure the period of the custom time frame
Let’s configure the time frame.
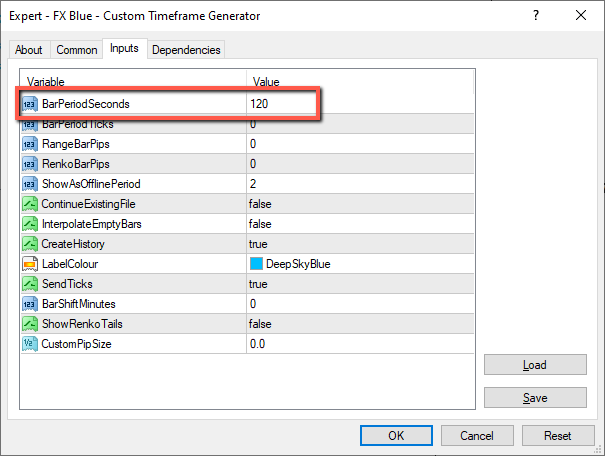
On the first line, there’s the option “BarPeriodSeconds”.
Here you’ll want to type the number of seconds that you want on every candle.
For example, for a 2-minute time frame, you want to type 120 seconds.
For a 3-minute time frame, you want to type 180 seconds.
I personally like to scalp low time frames, M1 and M2, that’s why I’m focusing more on those ones.
But you can customize, for example, a 2-hour time frame too.
For a 2-hour time frame, you want to type 2 hours x 60 minutes x 60 seconds = 7200 seconds.
And so on.
Step #6 – Set the name for the custom time frame
Now let’s look at the “ShowAsOfflinePeriod” variable.
Here you want to add any custom number for your time frame.
By default, it’s “1010”, but you can choose whatever you want, it will not affect the generation of the time frame.
Since we are creating the M2 time frame, I’ll simply put the number 2 here.
Step #7 – Enable the “CreateHistory” variable
Let’s find the “CreateHistory” variable and set it to true.
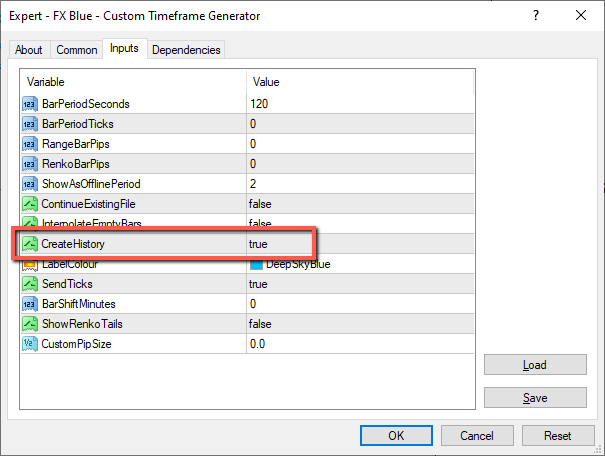
Otherwise, it will only create the custom time frame candles based on the ticks that will receive when you have your platform open and your past history will be blank.
Step #8 – Allow DLL Imports
Before clicking OK we still need to go to the “Common” tab and make sure that the “Allow DLL imports” option is selected.
If not, please select it.
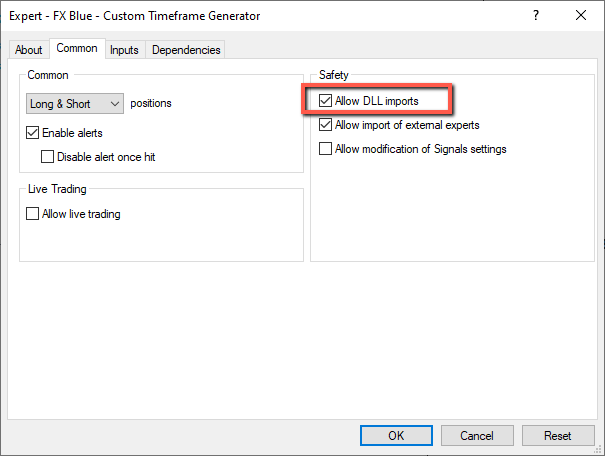
Now we are good to go and you can click the “OK” button.
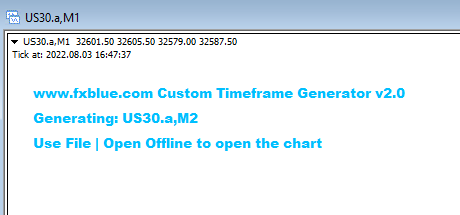
Notice that we have instructions on our chart now.
The symbol and time frame that we just created.
And how to open it.
Step #9 – Open the custom time frame chart
Open the custom time frame chart.
To open the chart we go File\Open offline
Look, this is called offline, but the chart will update in real-time with every new tick so don’t worry about that.
Now let’s just find the chart.
US30 M2, select it, click open…
And voilá.
Now we have our M2 time frame on US30 running on our MT4 platform.
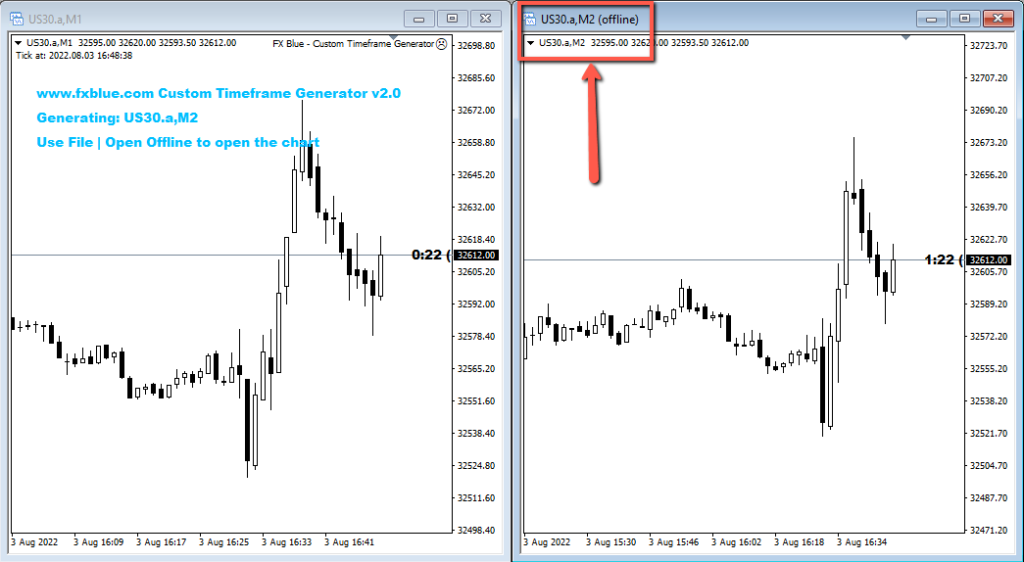
Check the candles time on your platform to be sure it’s working properly.
And make sure that you can see that it’s moving when the M1 time frame moves too.
How to stay away from trouble
We are not finished yet.
2 more things that you need to know to stay away from trouble when using this generator:
1 – You can’t ever close the M1 chart where you added the software.
Otherwise, the custom time frame chart will stop ticking.
So you must always keep it open to work properly.
2 – When you close and reopen your platform you may get a gap in your custom time frame history.
To fix it you may need to refresh the chart where you added the software.
You can for example switch the time frame to a different one and get back to M1. This will do the trick.
Eventually, it may not be enough, and in that case, you’ll also want to go to your custom time frame chart, right-click, hit refresh and you should be good to go.
Let me know in the comments if this is working for you, if you got any trouble, or if you know any alternative solution.